
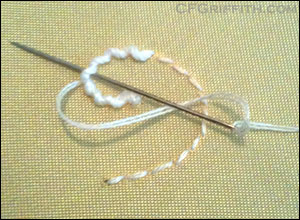
Wrapping the starting threads of the couched embroidery on the back side of the work.
Patterns used:
– None. Although there are examples online from the 18th century, I decided to guess the size and shape to see if it would work for my needs. I can alter any future versions I make, for whatever needs or supplies I have.
Fabrics used:
– Outer fabric, yellow satin (acetate?).
– Lining, white cotton.
Other materials used:
– Various colors of cotton DMC floss.
– Blue, white, and green crochet thread in size 3.
The lining and outer bag’s seams were sewn by machine. The drawstring channel was sewn by hand.
All the embroidery was done by hand.
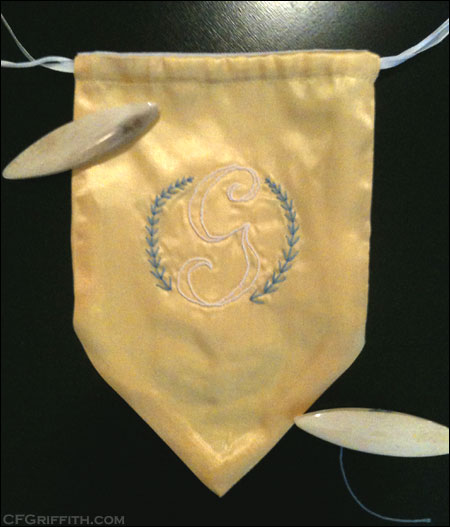
The “G” was couched on first with unknotted white crochet thread, and then covered in white embroidery floss using satin stitch. I used this side for practice to see what it would be like to use the couching technique. I wish I had put the design a little lower on the bag.
The blue “wreath” was embroidered using a blue embroidery floss with fern stitch.
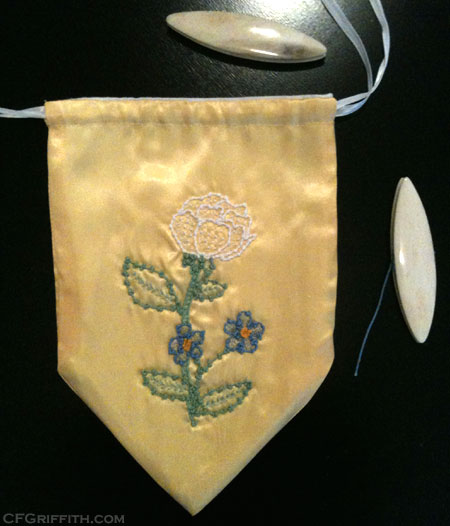
On the other side of the bag, the white rose was couched with white knotted crochet thread. The thread used a single overhand knot. The filler stitches were a cross stitch using white embroidery floss.
The rose stem was couched with green unknotted crochet thread. The center was filled with french knots using green embroidery floss.
The leaves and forget-me-not stems were couched with green knotted crochet thread. I used double-sided knots for this thread. The center vein on the leaves were fern stitch using green embroidery floss. The leaves under the rose were filled with seed stitch using green embroidery floss.
The blue forget-me-nots were couched with blue knotted crochet thread. I used alternating knots — single, and double-sided knots. They were filled with seed stitch using blue embroidery floss. The center of the forget-me-nots used a yellow-orange embroidery floss with french knots.
I left a little more of a gap between the knots to get a feel for how I would be able to turn and attach the knotted threads. I want to vary the thickness, pattern, and gaps for variety, so it was neat to see how the different knots worked for this piece.
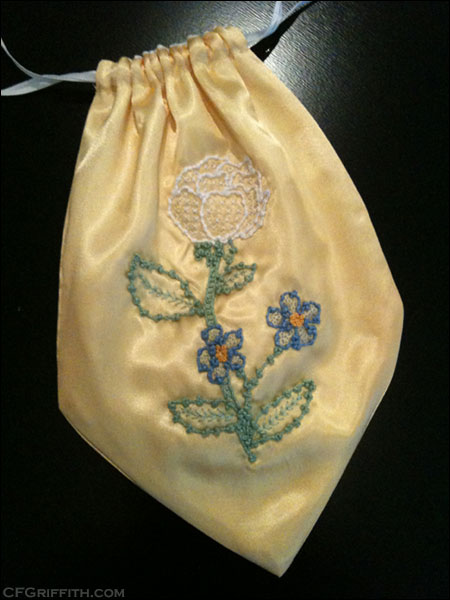
I do want to change the white ribbon drawstring for a wider ribbon, but this work bag should work fine for holding my knotting shuttles and thread. I can even fit one of the crochet thread spools in the bag if I need to.
I definitely want to get some period cards to wrap the knotted thread on. I’m a bit addicted to knotting, so I’m sure I will have a lot of it around. Having it stored carefully will be a good idea.
Photos:
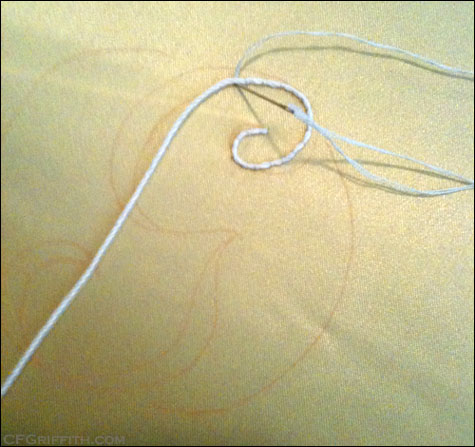
Couching the crochet thread -- I went back over the finished "G" with embroidery floss to cover it completely.
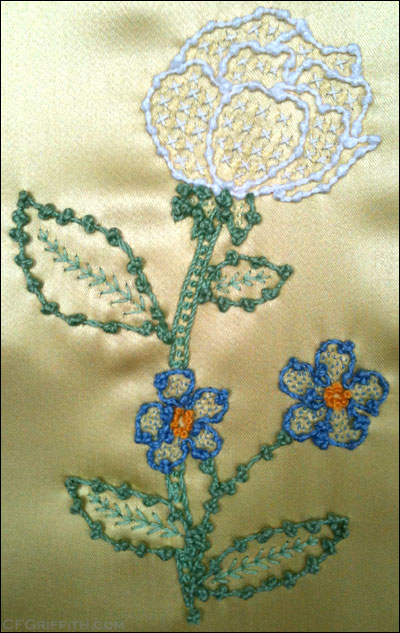
The rose and forget-me-nots using a variety of embroidery stitches and couched threads. My first project using the knotted thread from the knotting shuttles.
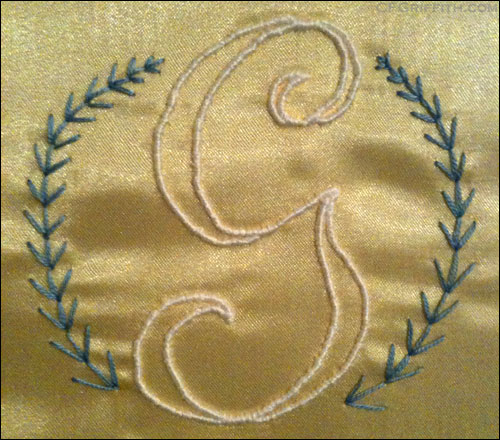
The finished monogram side of the bag. It was my first couched project, and I rushed it a little.
The finished work bag. I need to replace the ribbon with a wider ribbon. It will be nice to store my knotting shuttles and knotted thread.
I wish I had placed the embroidery a little lower on the bag.
I look forward to using this at 18th century costuming events -- I just love accessories, especially accessories you can use. I'm also addicted to using the knotting shuttles.
Here are blog entries that mention embroidered bags:
– Main entry.