
Patterns Used:
– None.
Inspired by some of the small bonnets with (apparently) smoother base-backs from the book Victorian Fashions & Costumes From Harper’s Bazar:1867-1898.
Fabrics Used:
– Some of the stiff, canvas-like fabric I’ve been using in bodices and stays.
– Black satin.
– Leftover red tulle I used to stiffen my plaid bustle skirt.
Other Materials Used:
– Black ribbon 1.5 inch wide ribbon.
– Wired 2.5 inch wide green ribbon.
– Feathers.
– Fake flowers and leaves.
– 16 guage craft wire (found in jewelry section at Joann Fabrics).
– Black electrical tape to bind connecting ends of the craft wire.
– Black, white, and various green threads.
Hand and machine sewing.
This is my attempt at faking a bonnet, and is not intended to be a detailed construction explanation for anyone researching. I wanted to be careful to mention that, since I had an idea for a bonnet, but could only work from some small drawings in a book, and no idea how to properly make hats or bonnets.
This was a weird project to make. It started off fun, but there were some frustrating and confusing moments. I almost gave up and just bought a straw hat to trim. I couldn’t let it go, however, because I was determined to have this style hat to go with an outfit. The design and trimming placement changed several times as I worked through how to construct the bonnet. Unfortunately, I was working on a deadline, so I should have started sooner. 😉
I do have to say, I have never made a hat from scratch before, and I also didn’t have the time or funds to purchase the appropriate millinery materials. This project does make me want to give it a proper try some day, however!
That said, I had a few ideas of how I might be able to fake my bonnet.
I started with the craft wire. I kind of wish there was something available at the store between the 16 guage and 20 guage, but I went with 16 because the 20 was too thin. I made sure my hair wasn’t bunned as high as I normally wear it, and I wrapped and bent the wire around my head in the shape I wanted. Once I was pleased with how that looked and felt, I used stretchy, black electrical tape and sealed the two edges of the wire together. I made that seam at the back of the head, and the edges of course overlap and were twisted around each other. This seam is of course bulky because of all these things wrapped around, but it seemed the best way to continue without dwelling on it too long.
Next, I found the best way to figure out how to make the fabric base was to put some cotton scrap fabric over my head like a veil, and then place the wire frame over that. My husband helped to mark the shape, so that I would be able to cut out a piece of fabric large enough to work with, and in the closest shape needed. This was the part I used the stiff canvas-like fabric for. Unfortunately, the fabric is so stiff, I cannot push any hatpins through it. The good news is, I don’t need anything. If it does turn out it slides around on my head, I can try to sew a comb under the front section to stick into my hair and help hold it in place. The design of the bonnet however, actually seems to work once it’s on my head and is held in place thanks to the angle of the tie under my chin, as well as my bunned hair.
The canvas base has two darts in the back of the piece, to help take up some of the bulk, and create a shape that fits on top of my head. I didn’t take any photos of the building process, because honestly I have no idea if this is something anyone should do (I certainly don’t want to imply that is how to make a hat or bonnet, especially for this style — that’s why I’ve carefully marked this entry to show that it was my attempt at faking this piece, so someone researching carefully would know I didn’t use period techniques).
Once I had the canvas base pinned to the wire frame (along with the darts pinned in place — and the seams were turned up on the outside, top section of the frame), I stitched the darts and sewed around the outside seams by hand, tacking everything in place. Then I pressed the darts, being careful not to get too much steam on the tape binding near the darts.
This is the point where I had confusion. I wanted a flat base for support and ease of construction. Now I needed to figure out how to get that period, mid-1880’s height over the front of the bonnet. I went through several design changes, looking all over the book I listed above, and saw a few details in many bonnets that inspired me to continue.
I took some leftover tulle, rolling and folding it to create height at the front of the bonnet. I tacked it down by hand sewing it around the edges. I’m already wondering if I’m seeing a bit of shifting, and I wish I had done a more secure job tacking the tulle to stay in place.
Next, I took a rectangular black satin scrap, and sewed gathering stitches to the front and to the back. It was wider and longer than the bonnet. I worked on the front side first, then gathered the back, and then worked on the sides to get everything to lay how I wanted it. Once it was in place, I basted the edges (this time, the raw edges were on the underside of the bonnet).
I decided to use wired ribbon that was wide, to help add to that period height. I folded bits of ribbon and held it to the bonnet to figure out a basic shape. I ran gathering stitches to form each section and pinched it to a manageable end for attaching.
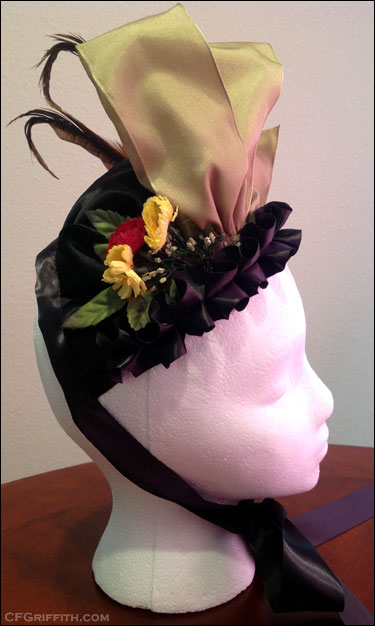
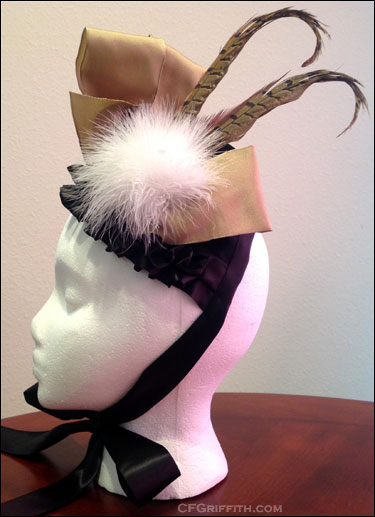
I also added three feathers. Two pheasant feathers, and one poofy white feather. I had a little trouble with the feathers. I had never used a curling iron to shape a feather end, and didn’t use a high enough heat at first. I went back and it worked a little better, but it was difficult to get all of the feather to roll with the iron. I also don’t have a small enough barrel, or else I would have finished the very end to have a tighter coil. I almost wonder if the feathers weren’t treated with something. They weren’t in the best of shape when I bought them, but were the nicest in the store (I was working on a deadline and didn’t have time to look for better feathers).
I had a little more trouble figuring out what to do for the flowers. I knew I wanted some splashes of color (yellow, and a red or dark orange), but I had trouble finding small enough flowers that looked nice. The flowers I got were also placed on stems in an odd way. It took a few tries to figure out how I would place them, and where. I ended up using only a few, tacked onto two leaves for another splash of color, behind the bow.
Across the front of the bonnet, and to hide all the spots where things were tacked on, I pleated a 1.5 inch wide black ribbon. Half of the width hangs over the edge, and the other half is covering the tacked-on items. I was going to take some leftover cotton voile (because I couldn’t find a white lace I liked enough) and gather a ruffle to layer under the black ribbon, but I decided I liked it without the white ruffle.
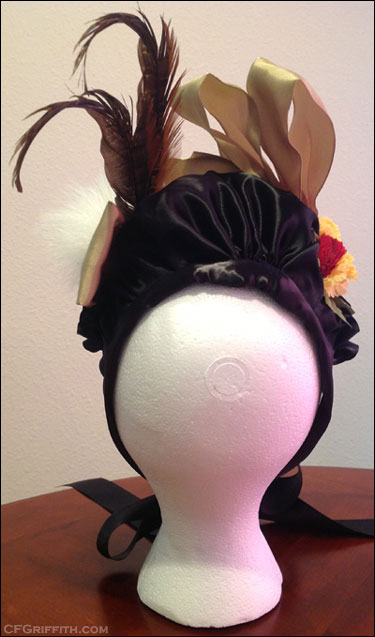
The last trim added was on the back edge. I used the same 1.5 inch wide black ribbon to cover the raw edges on the back side, and also provide the chin ties. The ribbon is stitched on the outside, turned over half way around the edge and stitched on the underside. Then at the edge of the bonnet on both sides, it opens to full width. If I could have changed anything, I might have made a satin tie so I could make wider ends.
I have to admit, even with the frustrations and “what am I doing!? What next?” confusion, I really like how the project turned out. As usual, my husband was a HUGE help telling me if he liked the placement of flowers or ribbon. I think this will be a fun item to wear, and it’s nice to have such a custom piece to go with my outfits.
When I took photos of me wearing it, I tried a different bun than I normally do and it was also lower than I should have placed it. It made the bonnet sit back too far on my head in some of these photos. I prefer it more when it sits closer to my forehead than towards the back of my head. Please see the Talma Wrap page for photos from the original photo shoot.
Photos:
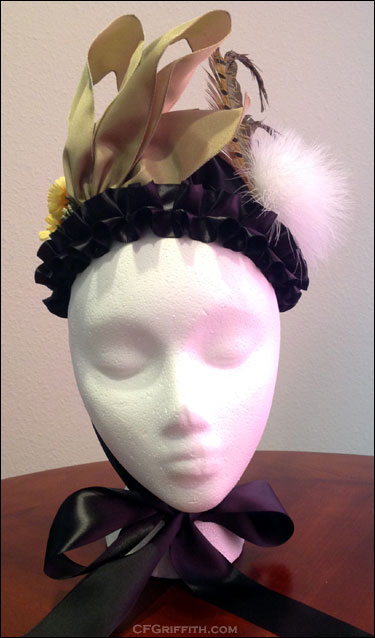
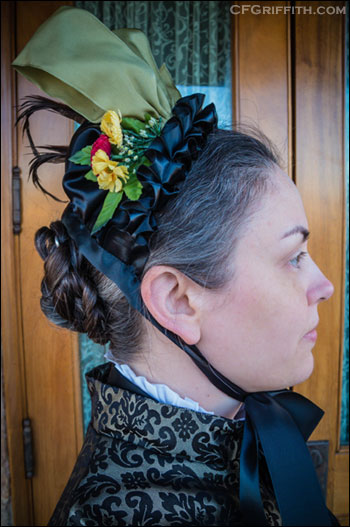
Unfortunately, the bun I wore my hair in this day was too low and the bonnet wasn’t sitting as forward on the head as I prefer.
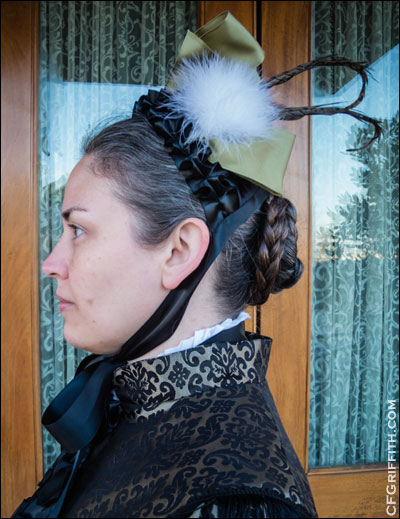

Next time, I hope to do a little more of a secure job creating the structure to stay up and forward. I think the left part is shifting back a little.